Configure FSX & P3D v1-v3
Note
This chapter is for users who have installed swift for the very first time or who are making a clean installation and do not have previous configurations to copy their settings from. If you are an existing user and if you have copied all settings during installation of swift pilot client, then you don't need to run the Configuration Wizard! You can manage all your settings through swiftGUI.
Important
If your flight simulator platform is P3D v4 or newer, then proceed to P3D (v4 or later) configuration.
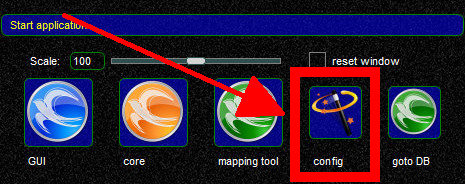
After the installation has completed, swiftlauncher will start automatically. If, from there, the Configuration Wizard did not launch by itself, start it manually:
Note
Should you have de-selected the option to launch swift Configuration Wizard during the program installation, it is possible to run the same initialization mode any time later by using the command line arguments swiftlauncher -i --bootstrapurl %%https://datastore.swift-project.org/shared/%%
Legal Wizard
The first wizard page deals with the necessary legal bits.

- accept license and data protection policy. Required item.
- this page also asks for your agreement to submit crash reports to our crash report collection server. Voluntary item.
About sending crash reports: In case that any swift application crashes, a report will be generated with information about which line of code caused this. With your agreement, the report will be uploaded to our server and helps the developers to diagnose and fix the cause. This agreement can be changed anytime later in the advanced settings dialogue in swiftGUI.
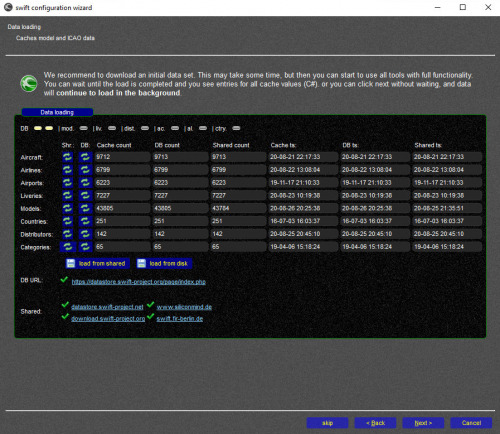
Data Loading Wizard
The next wizard will download all data form the database of swift automatically. You may continue to the next configuration page - data loading will continue in the background. This data is required by swift to be fully functional. It is not necessary to click any of the load buttons.
Copy Models Wizard
Note
This page can be skipped, should you have no previous copies of swift installed on your computer.
If you had a previous version of swift installed already, then this wizard will help you migrate your existing aircraft model cache and model set to the new version of swift:
- select the older version you want to migrate from the list
- select whether you want to migrate the model set and/or model cache and for which simulators
- click the button
start copy
Copy Settings Wizard
Note
This page can be skipped, should you have no previous copies of swift installed on your computer.
If you had a previous version of swift installed already, then this wizard will help you migrate your settings:
- select the older version you want to migrate from the list
- select the settings to copy from the older version: either one by one or use the button select all on the bottom
- greyed out items mean that no user setting is available and the default setting is in use. They cannot be selected
- click on the button
copy
Simulator Wizard
This page allows you to configure which flight simulator programs you want swift to work with and what model directories will be used or excluded.
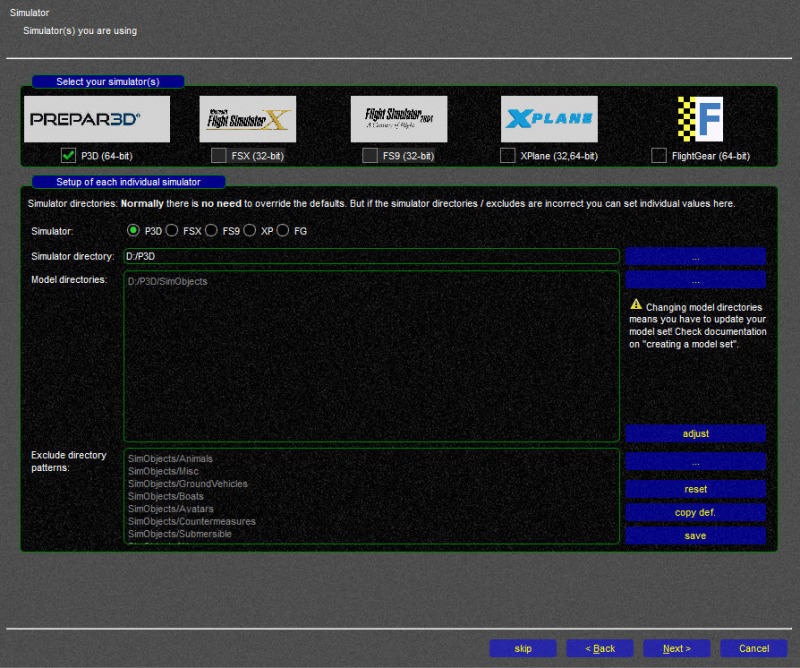
Select your simulator(s)
If you have multiple simulators installed and use them regularly, select all of them at the top of the page. Otherwise just select the one flight simulator platform, that you are using.

Setup of each individual simulator
In this you are able to configure the simulator path and any additional model directories.
-
Simulator: select the flight simulator platform that you want configure the paths for. Even if you have only one flight simulator platform installed, make sure that the correct one has been selected!

-
Simulator directory: check if it is correct

swift will try to detect as much as possible automatically and use it as default. Automatically detected data is shown in light grey letters. If the detected path is correct, there is no need to do anything more in this box. If it is not, click on
...to select the correct path. -
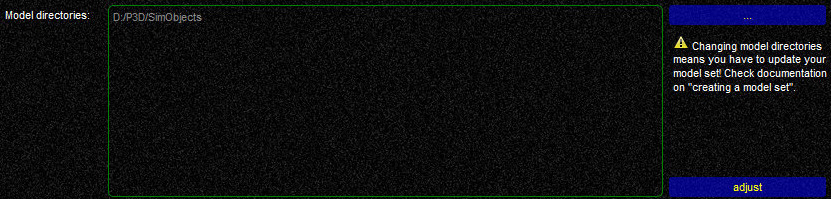
Model directories
If you do not have any AI aircraft installed, or if you are not sure about it, or if you would like to install more models, proceed to this page on our website.
Note
By default swift will add the subdirectory
SimObjects. By this swift will be restricted to searching for aircraft and CSL models in this path only. In case that you have additional AI aircraft in other folders on your computer, you add them here.- to select/add more directories, use the
...button - to remove redundant directories, fix file paths etc., use the
adjustbutton - after you have made changes, you have to select
save, or your changes to the paths will be lost
- to select/add more directories, use the
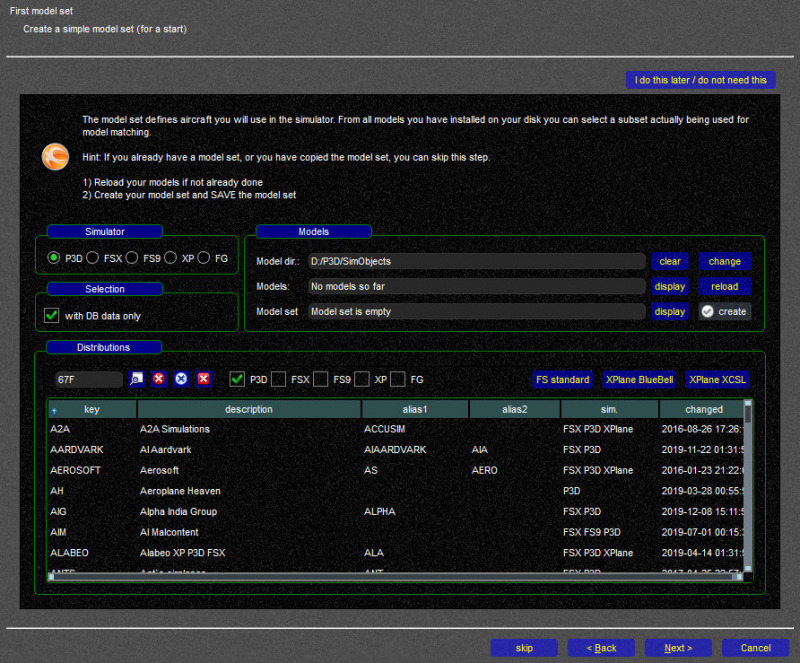
First Model Set Wizard
This wizard will help you create your first, basic model set to get you started. Each of the flight simulator platforms that you want to use with swift has to have its own model set.
Note
There will be no fine-tuning, no filtering: you will just add all aircraft models that swift can find inside the paths that you have defined in the previous section. If you want to perform some more elaborate work on your model set, you will need to use the Mapping Tool (swiftData app). Visit the section about the Mapping Tool and check out our YouTube Video Tutorial: Working with the Mapping Tool
A model set consists of AI (Artificial Intelligence) aircraft that have to be installed on your computer somewhere inside the X-Plane folder. Without any models installed and without any model set defined, swift will not run properly, because it won't have anything to create and render the aircraft of other pilots around you with.
Simulator & Selection
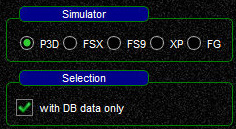
- select the flight simulator platform, that you want to create a first model set for: choose
FSXfor FSX orP3Dfor P3D. - keep the check mark activated at
with DB data only
Models
Now it's time to actually search for existing AI aircraft models, list them as your Stored Own Models and then add them to your Active Model Set.
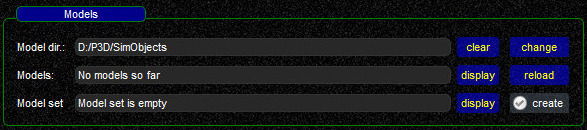
- Model dir.: check the model directory/directories and if necessary change it/them - go back to the previous page and do it in the Simulator Wizard
- Models: (in the swift Mapping Tool this is labelled as Stored Own Models)
- click on
reloadto scan your model directory/directories. The result will be a pop-up message window, listing all AI aircraft that swift was able to find. In case that you get a few error messages only, close the error message pop-up windowx
- click on
-
Model Set: (in the swift Mapping Tool this is labelled as Active Model Set)
- click on
createThis will extract all valid AI aircraft from Models (Stored Own Models) and insert them into your Model Set. A window with a list of these models will pop up - select
save 'P3D' to save your Active Model Set. Failing to do so will result in losing your changes to the model set
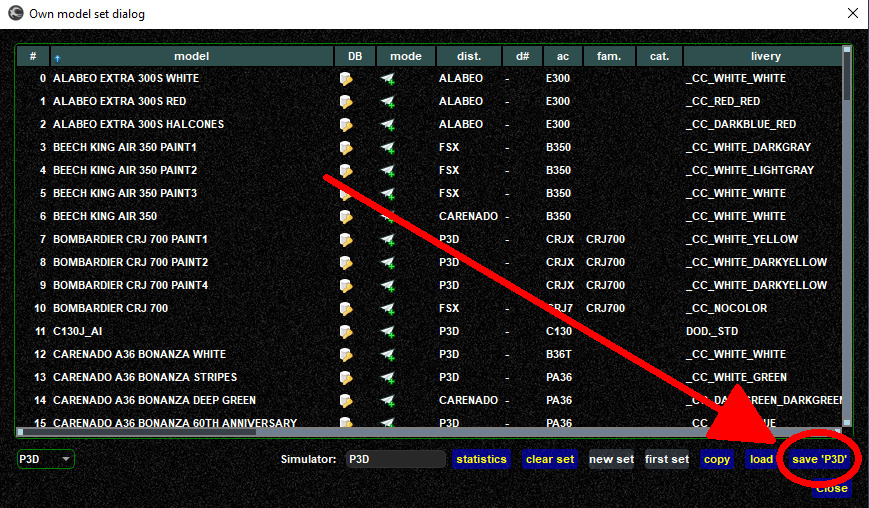
- click on
Believe it or not, but you just created your first model set for swift, well done!
FSX / P3D v1-v3 Terrain Probe
In case that you are using FSX or P3D v1-v3 (32bit applications), then we strongly recommend you to install our Terrain Probe. This will make sure that other aircraft around you will be displayed at the correct height in relation to your aircraft and scenery.
Please proceed to our FSX/P3D v1-v3 Terrain Probe Installation Instructions.
Hotkey Wizard
The Hotkeys Wizard allows you to configure hotkeys.

You have to define at least one joystick button or keyboard key as Push-To-Talk (PTT), otherwise you won't be able to talk to Air Traffic Controllers.\

- you can assign multiple keys or buttons to one single function
- you can
add,editandremovehotkeys
Adding a new Hotkey
- select
add - Action: select a function,
Voice==>Activate push-to-talk - Combination: click on
[Select]and then press the button/key that you want to use as PTT
Tip
The Config Wizard presents you only with a reduced selection of hotkey-functions to get you started with a PTT key. You can find many more hotkey-functions in the hotkey settings in the swiftGUI application

Congratulations
You are now done configuring swift!
Go ahead and start swiftGUI.
You can do this through swiftLauncher by clicking on the blue swift icon ![]() or through the swiftGUI shortcut.
or through the swiftGUI shortcut.
Tip
you can configure your swiftGUI shortcut to start the client in frameless mode by adding -w f to it.
Your "target" should then look like this YourDrive:\YourDirectory\swift-x.x.x-64bit\bin\swiftguistd.exe -w f
Before your first flight check out this Tutorial Video to take our program tour of swiftGUI and show you further setup options.
You can find more tutorial videos on this dedicated page.